Randomly Moving NPC Guide
Overview
This guide will show you how to optimize the odds of hitting your target RNG Advance when doing RNG Manipulation in the Generation 5 Pokémon games, despite any number of randomly moving NPCs nearby.
If you are new to Gen 5 RNG or have simply never checked out this page (or its previous incarnation in the form of a Google Doc), thoroughly read the remainder of this "Overview" and all of its sub-sections ending with the "How to use this tool" section.
If you already know about all this, you can also just skip ahead directly to the Location RMNPC data (name of that section may change in the future lol).
What are randomly moving NPCs?
Most locations have several NPCs standing or walking around somewhere, but not all of them advance the RNG.
But why do we even care? We care because some of these NPCs can advance the RNG forward when loading into the game before we can open up the menu to e.g. check our Chatot pitches or use Sweet Scent and then they can advance the RNG again during Sweet Scents (and Honeys) Pokémon summoning animation. This can make especially Wild RNG with Sweet Scent or Honey very annoying when there's a specific kind of NPC around. They do still affect all other RNGs such as Static or Egg RNG to a lesser extent however.
There are 3 different kinds of NPCs in static NPCs, NPCs with a specific movement pattern and randomly moving NPCs.
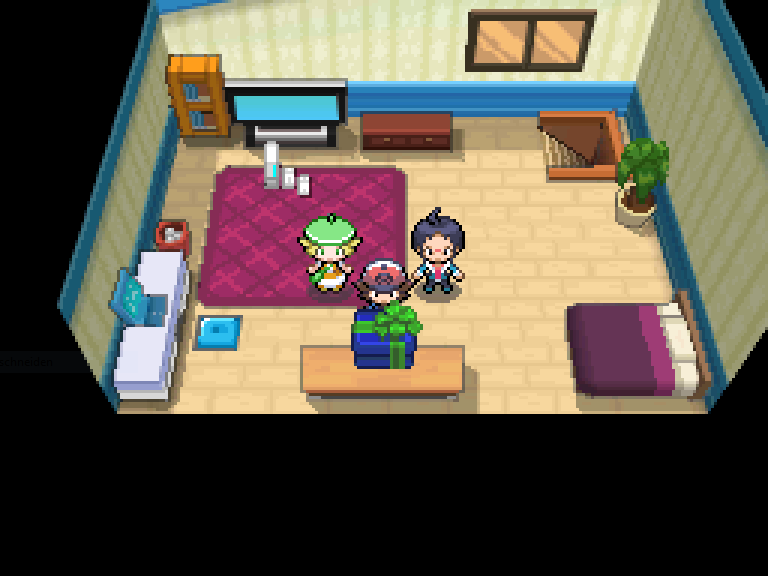
Static NPCs are all those that just stand still in place. They can neither move nor even turn into any direction unless you as the Player talk to them from a direction they're not currently facing. These NPCs can never advance the RNG forward, as they do not need to do an "RNG call" for anything. When you get your Starter Pokémon in Black or White version for example, Cheren and Bianca are there with you in your room, but they do not advance the RNG as they're static NPCs.
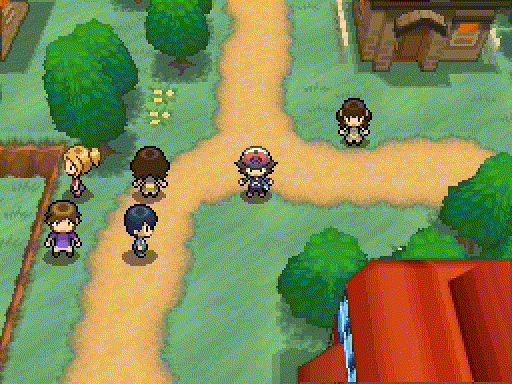
Next up, NPCs with a specific movement pattern are all those that always move the exact same way without variation. What exactly such an NPC's movement pattern looks like differs from NPC to NPC. As an example, the 4 children in Icirrus City who dance around moving in a circle and even turning every few steps are this kind of NPC (ignore the Lass in the top right for now; we'll get to her shortly). They can never advance the RNG forward, as they also do not need to do an "RNG call" to determine their always consistent movement.
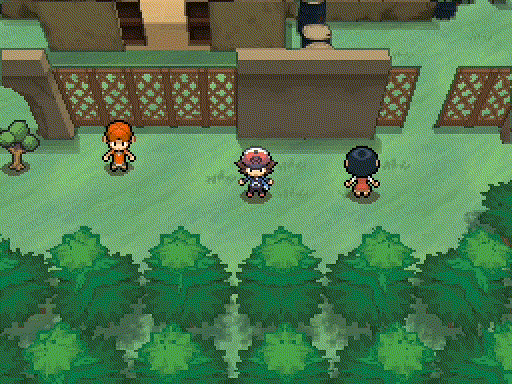
And finally, randomly moving NPCs, or "RMNPCs" for short, which I will call them for the remainder of this guide, are all those that can either turn in place randomly facing into at least 2 different directions or those that can move freely within a predetermined Area. An example for a RMNPC that can turn in place randomly would be the Lass top right of the 4 dancing children in Icirrus City.
An example for a RMNPC that can move freely within a predetermined Area is the girl in the Dreamyard that gives you a Pansage, Pansear or Panpour depending on your Starter choice.
These RMNPCs can advance the RNG forward, as they do an "RNG call" to determine what direction they're going to turn or walk to next. This random movement can also sometimes be invisible. If e.g. an RMNPC that can only turn in place is currently facing left, then doing an "RNG call" and finally gets the instruction to look left again from the RNG algorithm, nothing will visually change about them, but the RNG will still have advanced forward. For RMNPCs that can move freely within an Area, it's a similar story. If they are currently at e.g. the bottom edge of their designated Area facing down and then get the instruction to move down again, they will not visually move, but the "RNG call" will still have advanced the RNG forward.
Whether an RMNPC is currently visible on screen or not also does NOT matter, as the game decides whether an RMNPC is currently "loaded in", and thus able to advance the RNG forward, depending on a location's RMNPC loading zones. These loading zones can have wildly varying sizes. Some extreme examples are Village Bridge and Route 5. Village Bridge does not have any RMNPC loading zones, so that all of the RMNPCs are loaded in no matter where you stand, whilst Route 5 has 3 separate RMNPC loading zones despite being less than 20% the size of Village Bridge.
In most locations we can make use of these RMNPC loading zones to unload some or at times even all of the RMNPCs within a location just by standing in a specific Area of said location. I call these Less Noisy Areas and Silent Areas.
What are Less Noisy Areas and Silent Areas?
Let me show you an example to visualize what these Areas are.
Here we have the Exterior of Pinwheel Forest in Pokémon Black and White versions. Pinwheel Forest Exterior in BW1 has 3 RMNPCs total, and both a Silent and a Less Noisy Area.
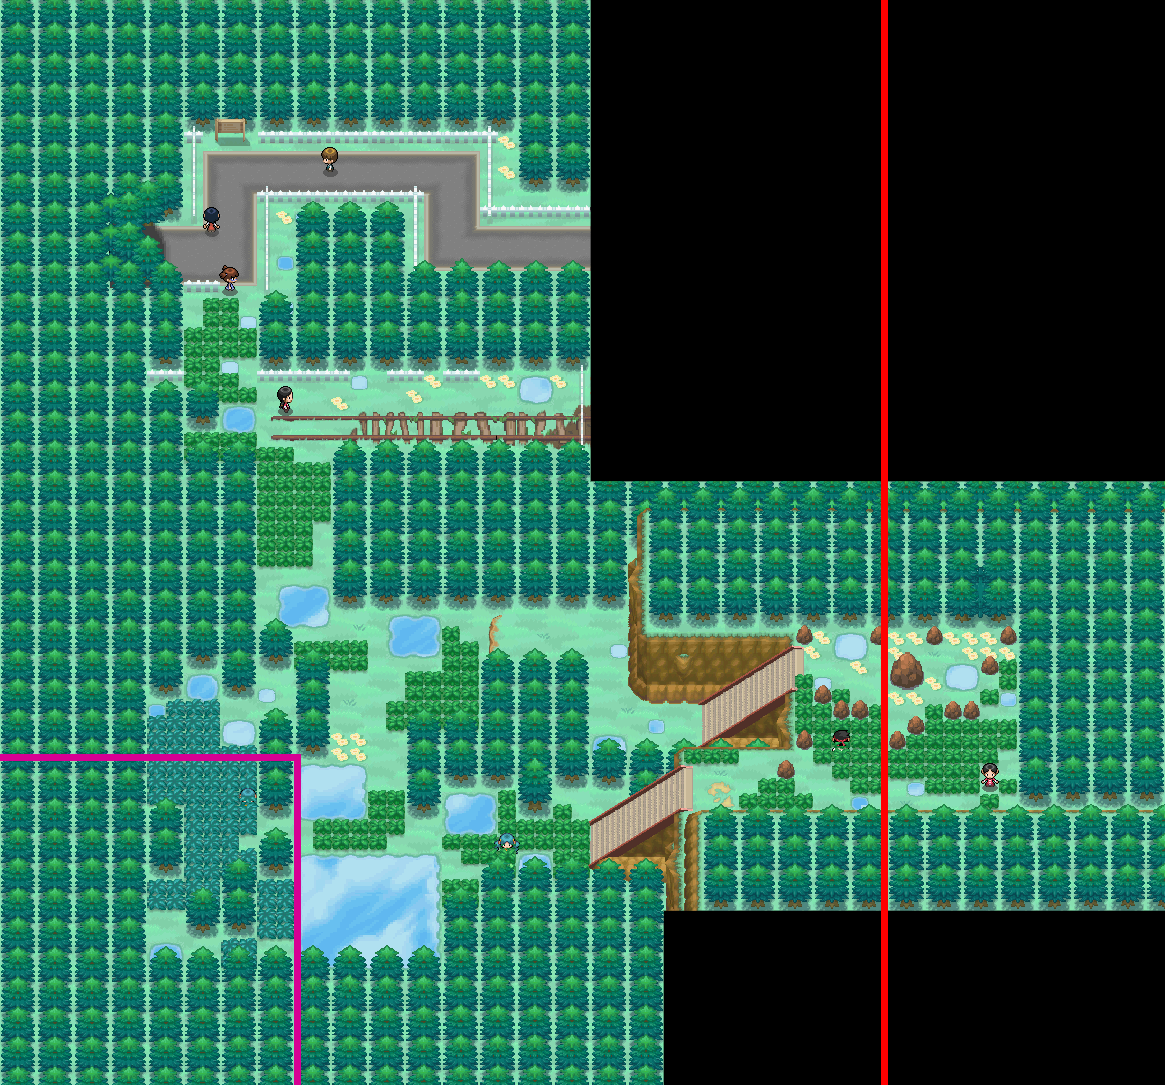
If you last saved your game anywhere right of the red line on the right, the next time you load up your game, not a single RMNPC of the 3 will be loaded in meaning the Area has no "RNG noise" and is thus a "Silent" Area. There are Grass tiles within this Silent Area meaning you can get Grass encounters here without having to worry about the RMNPCs at all.
If you instead want to go for a Dark Grass encounter, you can save the game bottom left of the pink marked Area in the bottom left.
Should you move during your RNG, because you're doing Phenomena or Step Encounter RNG, and accidentally leave a Silent or Less Noisy Area, you just have to go back into it and open up any submenu (party, pokedex, bag, trainer card or settings) to unload any RMNPCs you loaded from outside of the Silent or Less Noisy Area.
This is also the perfect time to talk about the lines having different colors. Each color represents how many RMNPCs are loaded in within the marked Area:
Red = Silent Area with 0 RMNPCs loaded in (if there's 1 or more in the overall location) Orange = 1 RMNPC loaded in (if there’s 2 or more in the overall location) Pink = 2 RMNPC loaded in (if there’s 3 or more in the overall location) Purple = 3 RMNPC loaded in (if there’s 4 or more in the overall location) Blue = 4 RMNPC loaded in (if there’s 5 or more in the overall location) Black = 5 RMNPC loaded in (if there’s 6 or more in the overall location)
You don't have to remember these colors, as each Silent and Less Noisy Area has an in-depth description later on in this guide, which includes how many RMNPCs are loaded in. It's just there to make it a little bit easier and faster to see how many RMNPCs are loaded in if you do remember.
Unfortunately, not all locations have a Silent or Less Noisy Area (like the earlier mentioned Village Bridge) and not all Less Noisy Areas are created equal where some only have 1 RMNPC loaded in whilst others still have 5. But they are always the better option compared to standing in any random place within a location.
How to adjust for RMNPCs to still hit your target Advance
Whenever you do an RNG using PokeFinder, you’d generally stop 1 Advance before your target, but depending on the location you’re RNGing in, that may never let you hit your target Advance. Instead you will want to change how many Advances before your target you stop at depending on how many RMNPCs are present for whatever encounter you’re trying to RNG.
Following is a table detailing the most likely amount of Advances to expect the RMNPCs to do depending on how many are present. This table is based on mathematical calculations done using newly obtained knowledge of how EXACTLY randomly moving NPCs behave in Generation 5. Whilst the table does not reflect the optimal odds for every single Area in the game, as different Areas can have different amounts of Advances happening depending on the kind of RMNPC present. The variation per Area is small enough for this table to be perfectly applicable to 90% of Areas however, whilst still being fairly close to optimal for the remaining 10%. If you'd like to know the optimal amount of Advances to RNG with for EVERY Area in the game individually, check out the Gen 5 randomly moving NPC calculations sheet.
And just because many of these numbers say that 0 is the expected amount of advances, it of course doesn't mean that 0 is the only possible number. At minimum, 2 Advances is also always possible if 0 is possible, though less likely.
Since these are the expected Advances done by the RMNPCs, you must add the +1 base "Advance before target" to each of the encounter related numbers to get the amount you should actually stop at. As an example if you were to use Sweet Scent in an Area with 4 RMNPCs, you should stop 16+1=17 Advances before target on your first try. Several for RNG manipulation relevant actions were tested that you can see described in the first column (assuming as fast as possible, perfectly timed user input). There is no relevant Area in all of Generation 5 with 7 RMNPCs, so the table only includes numbers for 1-6 & 8 RMNPCs.
| Action ↓ / NPC amount & expected extra Advances → | 1 | 2 | 3 | 4 | 5 | 6 | 8 |
|---|---|---|---|---|---|---|---|
| Loading into the game | 2 | 4 | 6 | 8 | 12 | 14 | 18 |
| Using Sweet Scent | 2 | 6 | 10 | 16 | 22 | 24 | 36 |
| Using Honey | 2 | 4 | 10 | 12 | 16 | 18 | 26 |
| Exiting the menu selection using B/X for Statics/Eggs | 0 | 0 | 0 | 0 | 0 | 0 | 0 |
| Exiting the party using X for Statics/Eggs | 0 | 0 | 0 | 0 | 0 | 0 | 0 |
| Exiting the menu selection using B/X for Phenomena | 0 | 2 | 2 | 2 | 3 | 4 | 4 |
| Exiting the party using X for Phenomena | 0 | 0 | 2 | 2 | 2 | 3 | 4 |
| Exiting the menu selection using B/X for Step Encounter turning in place | 0 | 0 | 0 | 0 | 0 | 2 | 2 |
| Exiting party using X for Step Encounter turning in place | 0 | 0 | 0 | 0 | 0 | 2 | 2 |
| Exiting the Daycare, turning left and opening the menu | 2 | 4 | - | - | - | - | - |
| Exiting the menu selection using B/X for Lati@s | 0 | - | - | - | - | - | - |
| Exiting the party using X for Lati@s | 0 | - | - | - | - | - | - |
For Wild RNG in Areas with RMNPCs I HIGHLY recommend you use Honey instead of Sweet Scent if possible, as Honey's animation is 28% shorter than that of Sweet Scent, giving the RMNPCs less time to advance making Wild RNG quite a bit more consistent. Honey can be obtained via the Honey Gather ability using Combee (can be caught on Route 12) in all gen 5 games and is purchasable in BW2's Join Avenue Markets on lvl 2 and higher.
Exiting the party screen (or e.g. the Chatot summary screen) using X is always a little bit faster than exiting the menu selection screen (using B or X doesn't matter at that point; it's all about what screen you're on when doing the final "exit action"), so you should always close the party directly with X rather than back out to the menu selection first to minimize RMNPC advances for Static, Egg, Phenomena and Step encounters.
There’s generally 4 approaches you can use to try and hit your target Advance. Option 1 is the best with 2 following closely after. 3 is fine and 4 is just bad. I only mention 4 since it was thought to be the best way in the past and to explain why it isn't good.
-
Try the most likely amount of Advances before target only and then reposition the RMNPCs:
With this one you only try stopping the exact most likely amount of Advances before target. Then if you did not hit your desired Advance, you cannot simply try again. This is due to the amount of RNG the RMNPCs will Advance during Sweet Scent/Honey (/whatever else) being decided by a combination of where within their cycle you last went into a menu + the current RNG state. If you just try stopping the same amount of Advances before target again next RNG attempt, the position in their cycle will likely be either the same or at least very similar + the RNG state will be the same again as well leading to you hitting the same Advance you did not want to hit again. Instead what you should do is reposition the RMNPCs so they’ll be on a different cycle than the last attempt. To do this you must simply stand idly in the overworld for a few seconds (5-10 is more than enough) letting the NPCs move and then save the game. Since all loaded in RMNPCs last cycle position is saved when you save the game, this will effectively change how they will Advance next RNG attempt though since Sweet Scent/Honey/etc. are fairly short time windows, there is always the possibility that the Advances end up being the same. Now all you have to do is try again and if you missed your target again, reposition once more. Rinse and repeat until you get your desired target. The more RMNPCs that are present, the longer it’ll take to get your target on average. -
Try the most likely amount of Advances before target, vary your timing a bit and only then reposition the RMNPCs:
This is very similar to the first option; it may even be better. You largely do it the same way as in 1., but instead of immediately repositioning the RMNPCs you can try a few times (2-4 maybe) where each attempt you let the RMNPCs move a little bit longer than the last time (probably like 1 second first try and then +1 second each subsequent try) meaning they will be at a different part in their cycle than last time, which would have the same effect as repositioning them fully. In exchange this may make finding what Advance you’re on after loading into the game a bit more difficult. To make it easier to determine what seed you hit you can also load into the game as normal and instead only after confirming the seed via e.g. Chatot go back to the overworld and let the RMNPCs move freely for a bit. Just be careful to do this with a high enough target Advance so they don’t Advance past your target. -
Test the ~3 most likely Advances before target and then reposition the RMNPCs:
This is largely the same as 1., but instead of only trying the most likely number and then adjusting, here you’d try a few of the most likely ones and only after none of those yield results you reposition the RMNPCs. -
Compare and adjust (the old way):
With this approach you start at the recommendation and if you don’t get your target, catch to see what else you got and compare its encounter slot, nature, gender and ability to surrounding Advances to figure out how far off you hit. Next attempt adjust for the difference. Since the NPC movement is in part tied to the RNG Advance you stop on, stopping on a different one is fairly likely to yield a different amount of Advances, causing you to miss your target again despite adjusting. This makes this approach the most inconsistent of the four.
How to remove overworld weather
Any overworld weather prevents you from using Sweet Scent or Honey and in the cases of Rain, Snow, Hail and Sandstorms advances the PIDrng VERY fast.
In all Generation 5 games you can remove any Rain, Snow or Hail by simply changing the date to a date that does not have any weather, passing at least 1 loading zone (by e.g. entering a building) and then saving the game in the location you wish to RNG in later whilst there is no Rain, Snow or Hail present. Even if you now load the game on a date that usually has e.g. Rain, it will not start raining until you either pass a loading zone or finish a battle with a Pokémon or Trainer.
The Sandstorm at BW2's Reversal Mountain Exterior behaves the same way, making Reversal Mountain the only location you can easily get rid of the Sandstorm in.
Bulbapedia has articles for what days it Rains, Snows, or Hails on, and what days there is Sandstorm at Reversal Mountain's Exterior. I personally tested and added the dates for Snow, Hail and the Sandstorm at Reversal Mountain, but have not yet gotten around to finishing that testing up (finished all locations that are in every Gen 5 game, but only got to April for the BW2 exclusive locations as of yet).
That leaves Fog and Sandstorms as the final two weathers.
The Fog on Routes 14 and 15 you can remove by simply changing your console's date to whatever you set your birthday to be in the console settings. Then pass at least 1 loading zone and save the game in your target location without Fog there.
Finally there's the Fog at Giant Chasm and the Sandstorm at Route 4 and the Desert Resort.
In BW1 you can remove them via a simple glitch, but in BW2 they are permanent meaning you can never use Sweet Scent or Honey to do Wild RNG in those locations, but instead have to rely on other RNG methods such as Step Encounter and Phenomena RNG (the exception is Route 4 in Black 2 only, as it has no Sandstorm).
The glitch for BW1 is very easy and quick to execute:
- Save the game
- Change your date to be 1 month later than it was when you last saved
- Encounter a wild Pokémon
- Either knock out, flee from or catch the Pokémon
- Profit (all weather will be gone once the battle ends)
How to use this tool
You first choose whether you're trying to RNG something in BW1 or BW2 and can then select the location you wish to RNG in using 1 of 3 ways:
- Select it from the map
Here you simply use your mouse on the map to navigate to and then click on the location you wish to RNG in. - Select it from the dropdown
Here you can either type the location you're in into the dropdown or select it from the available options. - Select it from the full table
You can find all locations and their sub-Areas in the full table. Simply click on the name of one of the location names and the page will select that location and scroll you up to the information.
However you select the location, afterwards you can see all the information relevant to that location displayed right underneath the map including important information, an overview table and a description of any Silent or Less Noisy Areas including pictures (if the location has any such Areas).
Location RMNPC data
Map of Unova
Location information
Full table
Other info
How the trucks on Route 4 affect the RNG
They do not advance the RNG like RMNPCs or weather however, but are sort of a middle ground between the two. They advance at a similar speed to RMNPCs, but can also advance the RNG whilst the menu selection is up. They are loaded in even in the Silent Area.

So you're only safe from their advances inside the party menu, bag or any other submenu. If you're quick with opening up your party menu when loading into the game, there should be too little time for them to advance the RNG forward. Even if they do, you can fairly easily and quickly just find where in the RNG you're at, as they'll at most have advanced the RNG by a handful of advances.
If you are trying to do a Wild RNG after having removed the Sandstorm and now use Sweet Scent, they are guaranteed to cause exactly 4 advances due to the animation length of Sweet Scent. You'd just have to stop advancing 4 Advances earlier than usual or use Honey to summon the Wild encounter, as that has a much shorter animation leaving too little time for the trucks to advance. If you're interested in reading more about how they work on a technical level, check out the RMNPC Google Sheet.
Pokémon Centers with 0 RMNPCs for Wondercard RNG
BW1
Opelucid City, Pokémon League, Lacunosa Town, Undella Town, Black City and White Forest.
BW2
Castelia City, Nimbasa City, Driftveil City, Mistralton City, Icirrus City, Undella Town, Black City, White Forest and Accumula Town
Story differences
BW1
Chargestone Cave 1F has 1 additional RMNPC with Professor Juniper and Bianca there (might actually be the Magnet item; did not have any savefile to reconfirm this).
Relic Castle Lowest Floor entrance stairway room has 1 randomly moving NPC there in the Postgame in the form of a single Plasma Grunt (who you can quickly scare away to remove).
BW2
None found yet.
Next Steps...
If you find any mistakes, please double check your findings first and then report them in #retailrng_corrections_suggestions of im a blisy._.'s RNG manip assistance Discord server.
Thank you for reading and have fun RNGing!
Get the Pokemon you wanted? Consider supporting us on Ko-fi & keep us ad free!